The processor is the heart of a laptop. Yet, it may malfunction over time. So can you change the processor in a laptop to upgrade your device’s performance?
The short answer is yes. However, only a few laptops allow you to do so.
Replacing this part also needs a lot of effort and time. You also have to choose a model to fit your laptop, and we will give you a detailed explanation.
This article also has step-by-step instructions for replacing the laptop’s processor. Let’s read on to discover!
Contents
- Can You Replace The Processor In A Laptop?
- How To Choose The Right Laptop Processor?
- How To Change The Processor Of Laptop?
- Frequently Asked Questions
- 1. Can laptop change CPU?
- 2. Can we change processor in the laptop Core i3 to Core i5?
- 3. Is Intel Core i3 superior to Intel Core i5?
- 4. Can I upgrade my computer’s CPU from a Core i5 to an i7?
- 5. Intel versus AMD: which is better for work?
- 6. What is the heat sink in a laptop?
- 7. Do CPUs increase the amount of RAM available?
- Final Words: Can You Update The Processor On A Laptop?
Can You Replace The Processor In A Laptop?
In most circumstances, you won’t be able to upgrade your laptop processor. Some processor models are replaceable, but they are costly and hard to find.
The processor (Central Processing Unit – CPU) is the core component of a computer that handles all operations.
This part is the heart of the system. It’s in charge of controlling all of the other components of a computer.
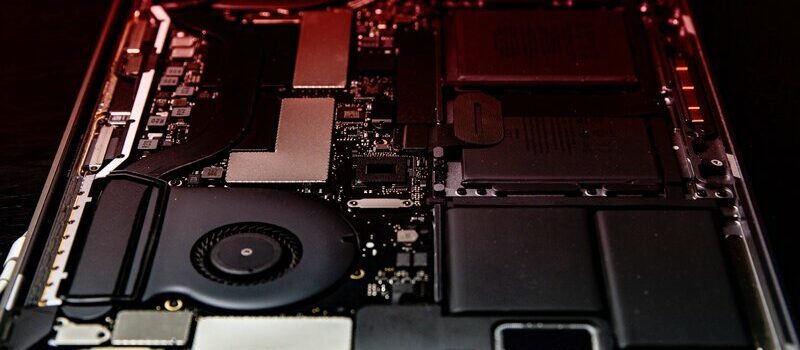
The motherboard soldered in CPUs serves as the system’s brain. If you removed the side panel from your desktop models, you can’t see it since it would be concealed behind a cooling fan.
Manufacturers mostly solder the CPUs directly to the motherboard, creating a challenge for the user who must detach the CPU to make a processor upgrade.
In most cases, you have to ask for the laptop’s warranty if you want to strengthen your old laptop.
If your laptop processor is replaceable, ensure that the processor fits in the same socket as the old one and that the motherboard can work with it.
Checking the manufacturer’s website or opening up the laptop and looking inside is the most straightforward approach to see what you can do with it.
The latter basically involves loosening a few screws beneath, but you should consult the service manual (or online tutorials) for further information.
It is quite uncommon to replace the CPU for laptops
How To Choose The Right Laptop Processor?
Selecting the appropriate CPU might be difficult. If you aim for a laptop processor upgrade, the new processor has to be compatible with your device.
By the end of this CPU guide, you will know what to choose for your computer.
Learn how the motherboards and processors work
The motherboard of a laptop is simply a large circuit board that works as the base. You will plug other computer components, such as the processor, into that base.
The size and connections of processors differ depending on the framework. As a result, you’ll have to ensure that your chosen CPU is compatible with the initial motherboard.
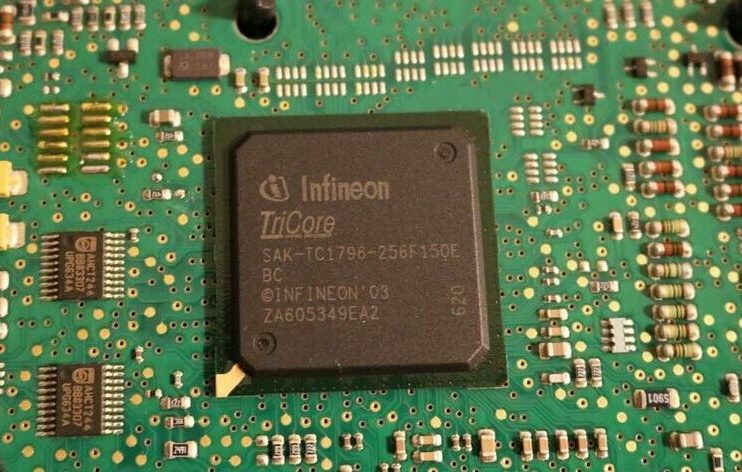
When it comes to processors, AMD and Intel appear to be fierce competitors.
These options apply a quite similar terminology for various processors and generations.
Whether you choose Intel or AMD, you’ll have a competent machine that can handle a wide range of tasks. However, there are noticeable disparities in value and prices.
There are arguments to be made for both businesses. AMD may be the right choice for you if you’re seeking a multitasking laptop processor that’s simple to upgrade and also affordable.
On the other hand, the gamers benefit from Intel Core i5 and i7 for their performance.
You need to learn the operation of the system
Check the device’s limitation
You can change and upgrade your laptop motherboards and processors of all Windows computers. However, changing the laptop CPU is usually impossible.
Even if your laptop model allows it, replacing the processor is a difficult task that is more likely to damage than assist your device.
Identify the motherboard’s model
Now, determine the motherboard type of your laptop model. You can get the basic information about the motherboard using Command Prompt.
Alternatively, you can view essential details by accessing a free site named Speccy.

Identify the model number of the motherboard
Determine the right processor socket
If you’re using Speccy to seek up the info on the motherboard, go to the CPU section and search for the “Package” header to see what socket type it is.
To check the laptop processor’s chipset, go to the Motherboard page and the Motherboard chipset header.
If you don’t want to employ Speccy, you may type your motherboard’s model number and name.
Then, type “socket” and “chipset” in a search query and browse the results.
Alternatively, you can find the connection type mentioned earlier on the motherboard near the processor socket.
You need to check the socket type as well
Find the motherboard
You can find a suitable laptop processor using your motherboard’s chipset and the same socket size.
Then, type this information on the internet, and you can identify what motherboard you need.
Buy the processor
Now you determine which CPUs will fit your laptop’s motherboard, you can go on to the next step.
You may choose the one that best meets your needs, computing demands, and geographical region.
Always compare prices to get the most terrific deal. You might be able to locate the same CPU for a lot cheaper online than you might at a store.
If you’re also purchasing a new motherboard, make sure to research prices on various websites and stores before making your purchase.
How To Change The Processor Of Laptop?
After choosing a compatible processor, you can install it yourself to boost the performance of your device. There is no need to buy a new laptop to change your experience.
The whole replacement process includes nine steps. Please take careful notes to achieve the best result.
Step 1: Update the BIOS
It’s the most important step before even looking into the computer’s core. You should ensure that the system is running the latest BIOS update. Manufacturers often establish these upgrades to assist with updated CPUs.
The importance of this issue is that if you insert a newer chip than your BIOS supports, your machine will not start at all.
As a result, it’s necessary to access the support center of the manufacturer’s site to find the most recent BIOS version for your laptop.
Step 2: Detach the battery
Although each computer has its own design, most processes for opening each model are the same.
Some versions feature a single back panel that allows users to access the memory card, hard drive disk, and processor.
Having a different model won’t be an issue because you’ve already obtained the laptop’s service manual, which includes all of the processes.
Now, remove the dummy card and battery. Your device, on the other hand, can have a built-in battery. You can uninstall it afterward in this scenario.
Because electricity is still present in a new motherboard area, laptops with built-in batteries require extra caution while disassembling. A single screw that falls on the circuit may cause serious harm.
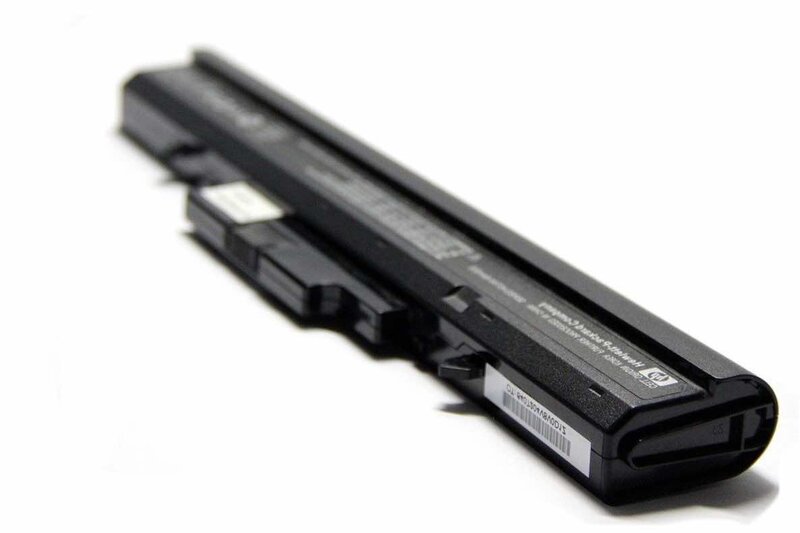
Start by detaching the battery
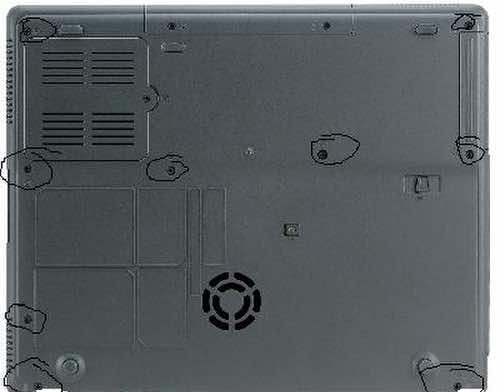
Step 3: Take the back cover out
You’ve unplugged the external and internal power sources. Then, it’s time to detach the back shell with screwdrivers.
Despite detaching the back covers, the laptop CPU is not visible. It implies you’ll have to disassemble the upper portion as well.
Screws may stay behind the rubber section of some models. Before moving on to the following step, you should first remove all screws from the back.
Also, if the hard disk or any other component protrudes from the case, you should remove it.
Step 4: Detach the keyboard
The keyboard, wireless adapter, and DVD writer must have loosened after removing all the screws.
Now, remove the keyboard gently while properly detaching the ribbon cable.
Detaching the keyboard may be difficult for most laptops, so take your time. An unanticipated jerk or an excessive force acting might cause permanent damage.
Uninstall the DVD writer, as well as the WiFi adapter, if your gadget has one.
Note where the screws came from when constructing. It’ll help when you assemble the device later.

Remove the keyboard
Step 5: Detach the upper shell
Remove any screws that may be underneath the keyboard. Also, if you notice any ribbons or connectors, take them out as well.
You must be cautious while dismantling the upper shell since there may be a connector or ribbon cable there.
Don’t use too much force. If you’re having trouble detaching the shell, look at the base for any hidden screws or parts that could be locking it in position.
Release the screws
Step 6: Remove the display assembly
If you can see the bottom of the display hinges before detaching the upper shell, you should perform this step before step 1. It varies depending on the laptop.
Now, loosen the hinges, disconnect the Wi-Fi antenna cables, and set aside the entire display unit.
Step 7: Remove the heat sink
You can now easily see the entire motherboard. If the CPU is on the upper section, you may reach the CPU and graphics card without removing the heatsink nuts.
If the processor isn’t visible yet, you’ll need to remove the motherboard from the chassis.
Before accessing any internal parts, please put on the antistatic wrist strap and make it fully grounded.
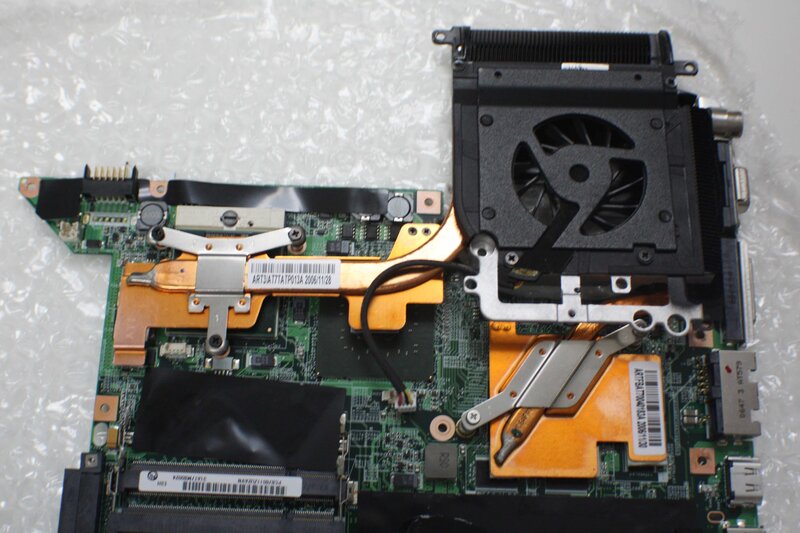
Detach the heat sink
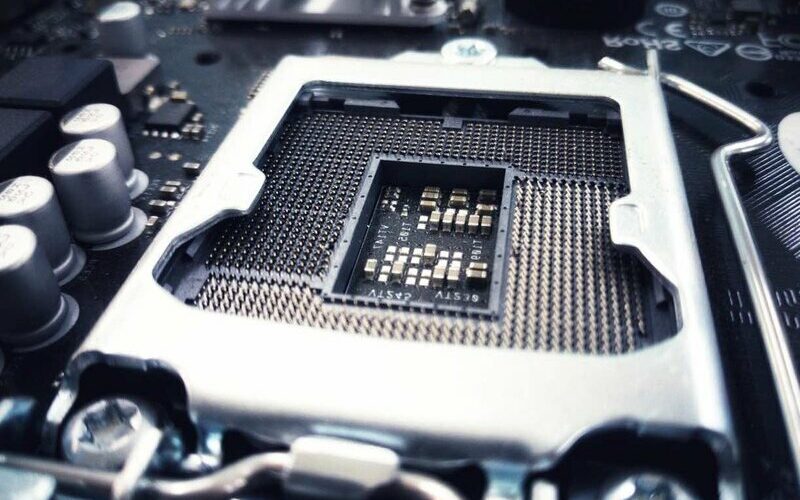
Step 8: Replace the CPU
The CPU slot will be in front of you after you’ve taken the heatsink. Carefully raise the CPU straight up, detach it from the socket, and set it aside by twisting the CPU socket screw counterclockwise until it ceases.
Now, position the new processor. It can slip automatically into its place if adequately set. If it requires a push, there may be an alignment issue. It would help if you double-checked it.
Remember to close the CPU socket by rotating the screw clockwise once you’ve successfully positioned the new CPU.
On the CPU socket of particular older laptops, there may be a locking bar, not a nut.
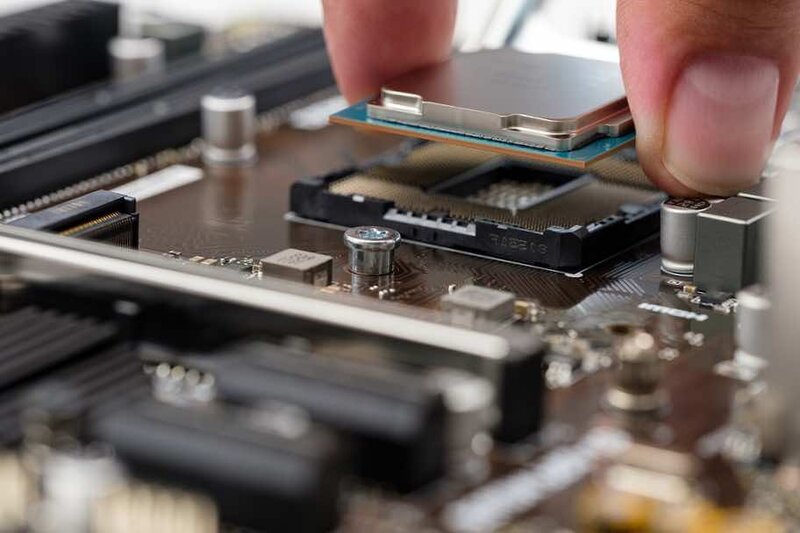
Place the CPU in the socket
Step 9: Apply the thermal paste and reassemble
Clean any leftover thermal paste using a lint-free rag and 99% isopropyl alcohol. Cleanse the heatsink if you have bought an old CPU.
Apply thermal paste on the top of the processor when it has dried. Then, spread the thermal paste thoroughly using a plastic card.
After that, reassemble your laptop after installing the heatsink.
Once the laptop has rebooted, go into the BIOS and make sure it can see the processor.
Finally, start Windows and enjoy the new processor’s performance improvements.
After installing a new processor, Windows may occasionally fail to start. You may have to reinstall it.
Frequently Asked Questions
Laptop users have shown their concerns about the compatible replacement of the processors in laptops. Here are some of their frequently asked questions.
1. Can laptop change CPU?
Some models feature replaceable CPUs. However, the chances to come across them are quite rare. If you can, expect a high price.
Most CPUs are soldered directly to the laptop motherboard, creating a challenge for a processor upgrade. To upgrade CPU, you’ll have to take it out and replace it with a new one.
2. Can we change processor in the laptop Core i3 to Core i5?
Yes, you certainly can upgrade your Intel Core. Here’s how you can do it:
- Check to see whether your CPU is upgradeable.
- Determine the motherboard socket model.
- Look for a compatible CPU to replace it with.
3. Is Intel Core i3 superior to Intel Core i5?
Intel Core i5 processors, in general, offer more features than Intel Core i3 units.
Multitasking and media production will benefit from the Intel Core i5. If you worry about your computer being slow on a frequent basis, the Core i5 can help.
4. Can I upgrade my computer’s CPU from a Core i5 to an i7?
Your current processor is from the fourth generation. So you can surely replace the CPU in your system with a Core i5 or i7 CPU that is compatible with other socket families.
5. Intel versus AMD: which is better for work?
AMD is famous as a low-cost, near-future choice. On the other hand, Intel-based laptops are now more attractive to business users.
Intel’s mobile lineup outperforms the competition in speed, increased laptop’s battery life, and efficiency, especially with a lightweight notebook model and comparable variants.
6. What is the heat sink in a laptop?
A heat sink is a piece of hardware that protects a chip against overheating. It’s as crucial as any other element in most laptop computers.
Consider the heat sink as a car radiator if you’re not very tech-savvy.
7. Do CPUs increase the amount of RAM available?
You can make your computer comprehend and function quicker by upgrading its CPU.
You can upgrade the laptop processor to improve the performance of the RAM you already have. An upgraded processor will also assist you in getting the most out of any more RAM you can add.
Final Words: Can You Update The Processor On A Laptop?
If the manufacturer claims that your laptop’s processor is replaceable, you can upgrade the laptop processor for a better system.
The most important thing is to check processor compatibility. Once you’ve grabbed the suitable model, the replacement process turns out to be a breeze.
Hopefully, you will find this article helpful. If you need any further information, please feel free to ask. Thank you for being interested in the post!

Paul Sullivan is the leading writer for articles on our website. He has over 10 years of experience as a technology reviewer, especially on laptops and computers.
With his long experience, we believe that he will bring you accurate and valuable knowledge and assessment.