
Laptop screens and keyboards are the most sensitive components that become dirty quickly. If you don’t clean them frequently, the dust and dirt will accumulate.
As a result, your machine’s performance degrades, and you feel your work progress suffers. So, how to clean laptop screen and keyboard?
Cleaning the screen is quite simple. You just need to apply some solution and gently wipe it. However, maintaining keyboards requires more steps. Sometimes, you have to dismantle the keys for a thorough cleaning.
LaptopBatteryOne will give you step-by-step instructions for wiping both the laptop screen and keyboard. Let’s follow along to find the answer!
How To Clean A Laptop Screen?
Cleaning the dirty computer screen is not a hard task. It takes you just a few minutes. As long as you are careful enough, the laptop screens will look brand new. Follow these simple steps for detailed instructions.
Step 1: Turn off the laptop
Since you’ll be cleaning the computer screen with a liquid, you’ll need to switch it off and unhook it from the outlet.
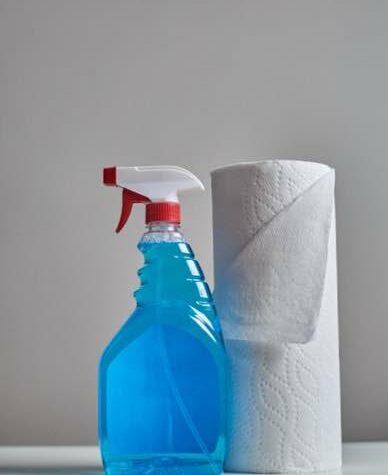
Step 2: Make the cleaning solution
Simple distilled water is the best option because it has no chemicals. It is also gentle on the computer monitor.
If a more robust cleaning solution is necessary to clean the computer screen, you can use a 50/50 white vinegar and filtered water solution.
Remember that you just need to use regular white vinegar, not cider vinegar or other types of vinegar.
Since it is chemical-free, pure water is superior to tap water.
Producers no longer advise applying cleaners containing ammonia, alcohol, or other powerful solvents on an LCD screen.
Fill a tiny atomizer container halfway with the solution. This container should be the spray bottle which you can push from its top to create a fine mist.
You need to fill the spray container halfway with the solution and close the lid.
Make the cleaning solution
Step 3: Apply the solution to a microfiber cloth
It’s preferable to use a fiber-free, microfiber, or lint-free cloth. Don’t get regular material to clean computer screen because it may scratch it.
There is no need to soak the cloth. You only want to moisten it, which is why you’re using the sprayer bottle.
You can also use the damp sponge instead. Take advantage of a household sponge, and you can achieve the same effect.
The solution might leak below the bezel. Excess water irreversibly harms your computer screen when wiping it with a moist towel.
To avoid getting the fabric excessively saturated, try spraying the solution to one corner.

Use the microfiber cloths to wipe the dust
Step 4: Gently wipe the computer screen
You can remove steaks by moving in a circular motion quickly. Use equal and light pressure on the fabric. Remember to put the cloth in touch with the LCD screens with just enough force.
When wiping the computer, be careful not to push your fingers into the computer screen or the cloth. The contact might permanently affect the LCD matrix and make your LCD monitor useless.
To minimize re-smudging the display while you work, hold your laptop at the very bottom or very top.
You may have to go over the LCD screen several times before removing all of the smudges. Depending on how many rounds over the display you make, you may have to re-dampen the fabric as you go.
Related:
How To Clean A Laptop Keyboard?
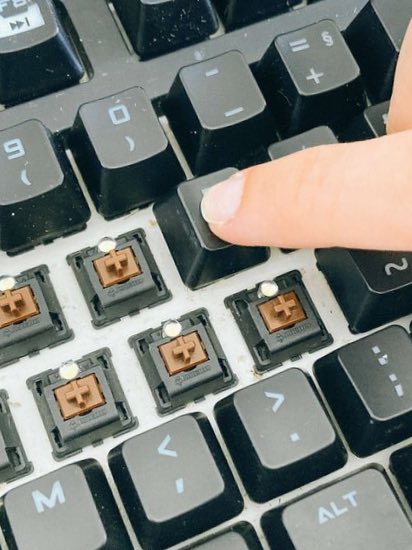
Cleaning the laptop’s keyboard is harder. This part of your device includes more details. Sometimes you need to disassemble it to clean every button.
We divide the cleaning process into basic cleaning, cleaning inner details, and cleaning to solve the liquid spilling incident.
Method 1: Basic cleaning
Let’s start with the simplest. You can do a frequent clean for your keyboard with these steps:
Step 1: Turn off your device
You didn’t pour any liquid on your machine. However, if a bit of moisture can seep inside, you should switch the energy off completely to ensure that the moisture won’t ruin anything.
You can disconnect the power cable after shutting down the laptop using the Power Menu settings.
Step 2: Turn the machine over
Turn the computer upside down. Then, shake it lightly. This step will help remove any big dust, crumbs, or debris hidden in the cracks of the keyboard.
It’ll be simpler to conduct a more thorough cleaning later on if you remove the big items first.
To make cleanup quicker, place a cloth below the laptop before shaking it.
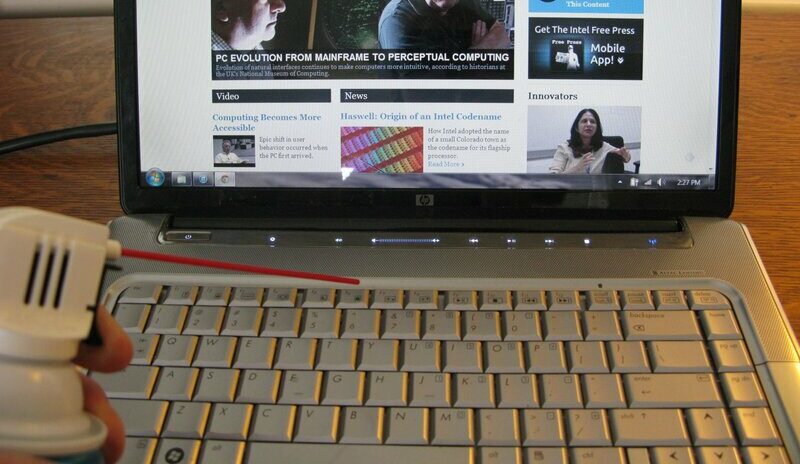
Step 3: Spray the cracks
To eliminate dust, use compressed air and spray between the buttons. Before using the straw, ensure it’s linking to the air compressor.
Bend the laptop to one side to spray in small bursts between the buttons, going through one end to the other.
The compressed air force will release any material caught between or beneath the keys.
Spraying compressed air while carrying the container upside down is never a good idea. It may allow propellant to enter the keypad, causing damage to the internal components.
Step 4: Wipe the keys
Microfiber attracts dust. Hence, a simple sweep across the keys will help eliminate some of the filth that has accumulated on your keyboards.
Step 5: Remove the grime
You can use a cotton ball coated with isopropyl alcohol to remove stubborn filth. Alcohol will evaporate fast, making it a safer choice than water for cleaning your laptop.
Furthermore, alcohol is very effective at removing the greasy stuff left behind by your fingers.
Always add some alcohol to the cotton ball beforehand, rather than pouring it immediately over the keypad.
Step 6: Eliminate germs
Finally, clean up the keypad with a soft cloth to kill bacteria. If you still worry about germs, clean the area of the keys with a disinfectant scrub.
On the other hand, towels containing bleach are not suitable since they might harm the keys’ protective layer.
Method 2: Clean inside the keyboard
If you dropped anything sticky or if there are huge crumbs caught behind the keys, it’s a great time to clean underneath the keys. Here is how to do it.
Step 1: Check if the keys can come off
Google your laptop model to see if you can remove the keys. The keycaps on some models may come off quickly, exposing the surface behind the keys.
On specific computers, however, the keycaps remain permanently attached.
Step 2: Pull the keys out
Keycaps stay in place by little plastic clips that can shatter, even if they’re replaceable. If the keyboard is filthy, you shouldn’t remove the keys to avoid harming it.
Before you pull the keys out, you can take a photo of them. The picture will guarantee that you won’t forget the correct positions of the keys.
The arrangement of the letter and number keys may be simple to memorize. Your keyboard is likely to have function keys and special characters, which might be confusing.
Check if you can remove the keys
Step 3: Pry the keys off
Pry the button upwards by slipping the tool’s tip under the bottom of the button. The keycap will pop off. If not, don’t pressure it because the excessive force may damage the keyboard.
Make sure you store the keycaps in a container so they won’t get lost.
A toolbox containing little metal or plastic bits is excellent for sliding beneath the laptop keys. You can buy them at an electronics goods store.
Otherwise, a butter knife, a screwdriver, and even your fingernail will suffice.
Step 4: Clean beneath the keys
Wipe below the keyboard with a microfiber cloth or an alcohol-soaked cotton ball. Don’t apply any liquid since the internal workings of your machine will be more visible without the keycap.
Wipe below the keyboard with air
Step 5: Install the key cabs
If you have to deal with a sticky situation, soak a cotton swab in isopropyl alcohol and gently sweep away the stain.
Make sure you align the edges of each keycap correctly before placing it in its allocated place. Then, start pressing the key down from the lower edge until you hear it pop in.
If pushing the key back doesn’t work, check your laptop’s user manual. There may be some particular directions for key removal.
Method 3: Clean the liquid spill
Laptop users may not expect it, but a liquid spill can happen at any time. It would be best if you cleaned the keyboard immediately to avoid any problems.
Step 1: Turn off your laptop
Remove the power cable immediately and turn off your laptop. If moisture comes into contact with the electronic systems in your computer, it can cause irreparable harm. You may help reduce the chance of electrical harm by working promptly.
Do not touch the machine if it begins to steam or smoke or if you notice popping or bulging. It may get severely burnt or electrocuted.

Turn off your machine immediately
Step 2: Place your machine on a towel
Open the computer as large as possible, then place it face down on an absorbent fiber.
You may enable gravity to take moisture away from your motherboard as well as other electronic parts by turning the laptop upside down.
Step 3: Blot the liquid
You can choose a microfiber cloth or a lint-free cloth to dry your laptop.
If you don’t have any lint-free cloth, use whatever is available, such as a paper towel, dish towel, or T-shirt.
Step 4: Leave the machine propped up
Allow your machine to dry for 1 to 2 days while propped up. You need to wait.
Even though the outside of the computer seems to be dry, moisture may get trapped within. Allow at least 24 hours for the keypad to recover before trying to switch it on again.
Please don’t use a hairdryer to dry; it will blast dust into the fluid inside the machine. The blow may cause a dirt buildup within your laptop, preventing it from functioning properly.
Things aren’t serious if you spilled a little water over the keypad. Nevertheless, if you poured a large, sugary beverage on your pricey laptop, think about having it broken down and repaired by an expert.
Cleaning services might cost upwards of $500.
If you have experience with electronics, you can disassemble it and clean it on your own.
However, some computers need specialized equipment to dismantle, and you may not have it on hand.
Step 5: Insert the battery
Once your machine has dried sufficiently, insert the battery and switch it on. The decisive moment is here. Give your device another 24 hours to air dry out if it still doesn’t function.
You can change the keys or utilize a USB keypad if your system software starts up, but the keypad does not work.
You can learn more tips for cleaning keyboards by watching the following video:
The Bottom Line
Everything needs maintenance. Cleaning is the most straightforward and effective maintenance method you can try.
Cleaning computer screens and keyboards are both simple but require some effort, time, and patience. If you care enough, your laptop can last longer.
Hopefully, you will find this article helpful. If you need any further information, please feel free to ask. Thank you for reading!

Paul Sullivan is the leading writer for articles on our website. He has over 10 years of experience as a technology reviewer, especially on laptops and computers.
With his long experience, we believe that he will bring you accurate and valuable knowledge and assessment.