Nowadays, many people choose to make their own laptop rather than buy a pre-assembled one because of the numerous advantages.
So, how to build your own laptop? After choosing all the components for your computer, follow these steps to build your own laptop:
- Flip-up the laptop shell.
- Install the CPU.
- Insert the network card, RAM.
- Install the hard drive.
- Install the fan.
Let’s get into the details with LaptopBatteryOne!
Why Should You Build Your Own Laptop?
Build Your Own Laptop
We frequently purchase pre-configured OEM laptops straight from shops or manufacturer sites. These laptops appear to meet the needs of a wide range of users and devices.
However, these computers may not suit individual demands, particularly for gamers and professionals. Furthermore, bespoke computer computers are pretty cost-effective; that’s why you should build your laptop.
Because you may pick computer components according to personal demands and do not have to spend money on parts you do not need, the performance of customized computers significantly exceeds that of brand PCs at the same cost.
As a result, constructing a notebook is worthwhile. You can build your laptop in various ways:
Ask For Customize Service
Some PC manufacturers, such as Dell and Lenovo, provide bespoke laptop services. They offer you the option of selecting components such as CPUs, hard drives, and screens. Then, they build the computer according to your specifications.
However, if you are on a budget, we do not advocate this technique since this approach is not economical. This approach is only acceptable if you have no prior experience building a laptop.
Build It Yourself
Go for this approach if you want to obtain a high-performance computer for a reasonable price.
If you have never built a laptop before, we will explain how to do so in the following sections. Continue reading to find out how to make your laptop.
How To Build Your Own Laptop?
The two necessary things to construct your laptop are choosing components and putting them together.
What would you need to put together a computer? What factors should you consider while purchasing computer components? Let’s get started!
Choose The Components
When it comes to creating your laptop, the most crucial consideration will be the materials inside. Most computers are composed of various components, each with its advantages for the cost and performance.
RAM, processor, storage device, network card, and graphics card are all options. Because these components are typically replaceable amongst notebooks, you may have many options to pick.
The case’s screen resolution, design, and other integrated features vary from manufacturer to manufacturer. When it comes to assembling your computer, the very first thing you have to do is choose your components.
Then you may select a framework that is appropriate for these parts. Let’s go through each component to choose the most suitable pieces for your needs.
1. Processor
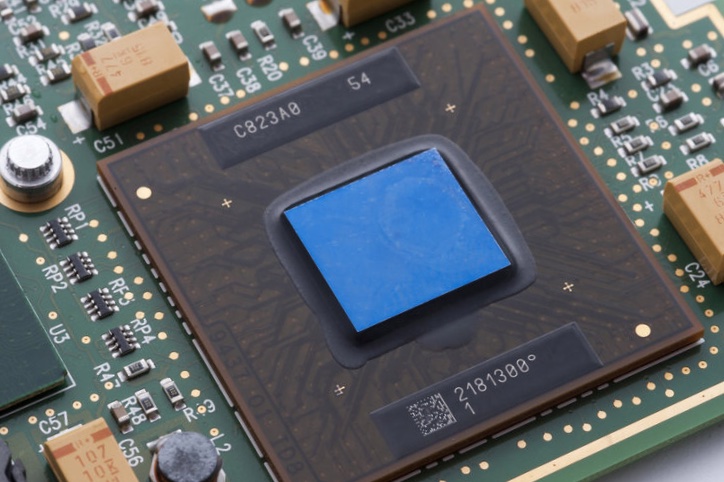
Processor On Laptop
The processor, or we usually call the CPU, is the brain of a computer. In general, your entire computer comes with one single chip.
It decides how energy-efficient your self-assembled computer will be and which additional components you may choose. These mobile processors are the most energy-efficient ones available.
They are only appropriate for casual users and appear in laptops that require a long battery life. The Intel Atom, Core m3, m5, m7 are the weakest to the strongest processors.
These CPUs are typically attached to the motherboard and are not available in custom computers. The Intel Celeron, Pentium, and E-series AMD CPUs all come with affordability in mind.
These are available in low-end computers, yet they provide adequate performance for basic office activities on the laptop. Most manufacturers may substitute one for a standard CPU if you do not want much from the laptop.
You can find one of these CPUs in the majority of computers. For a custom device, you may select between Intel Core i3 and i5 CPUs. The i3 is a fundamental processor, yet it performs well in the office.
The i5 seems to be more multimedia-focused, and it can play several mid-level games. AMD also offers the A-series CPU, which compromises the i3 and i5 processors for performance.
The speed is where you’ll discover the most powerful systems, whether you are searching for a polygon-crunching gaming laptop or a cutting-edge media machine. The Intel i9 is presently the most powerful processor available.
The i7 comes with a dual-core ‘prosumer’ variant in its 6th iteration for those who want additional power. Alternatively, you may choose one of the quad-core K or HQ CPUs, which consume significantly more power.
2. Memory (RAM)
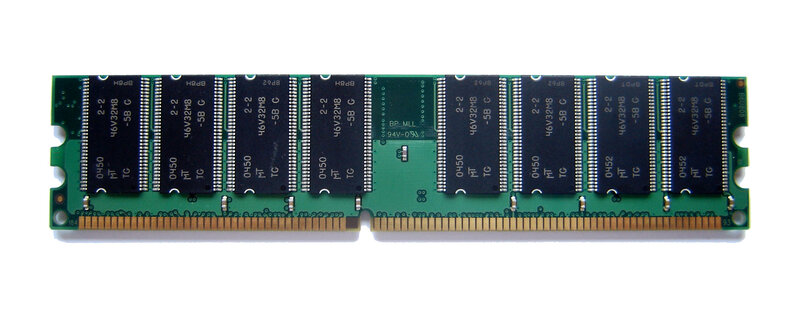
RAM
The RAM of your notebook is where it keeps all of the data that it is presently working with. Laptop memory is similar to the desks where office workers sit to complete their tasks.
Consider how difficult it would be to manage a massive quantity of data paper on a cramped, small workstation. This feeling resembles using a laptop with insufficient RAM.
The size of the RAM is the most visible metric to evaluate the performance of your RAM. Some notebooks come with as low as 2GB of so dimm memory chips, while others have 32GB.
For many people, regular online surfing and PC use will require at least 8GB. Many users would almost certainly want to upgrade to 16GB of RAM, which is currently the best balance of value and price.
Although a few programs can consume this much laptop memory, 32GB is a good option for multimedia users and heavy gamers. Fortunately, many notebooks enable you to customize the amount of RAM installed.
Because your laptop memory slots are available to keep up with the processor, you do not have much influence over this.
DDR3 and DDR4 are available on laptops. Check the specs for your CPU or mobile processor if you are unsure which one to purchase.
3. Storage
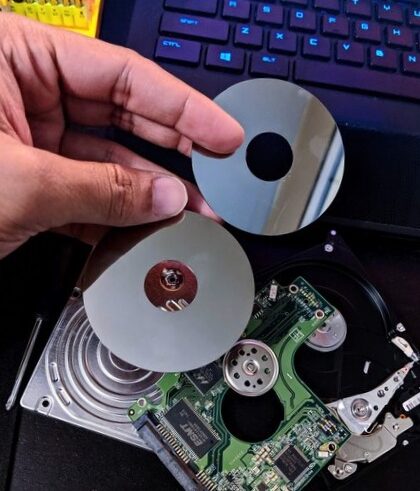
The Hard Disks On Laptop
The storage is where you keep your laptop’s operating system files. When it comes to building your laptop, there are several different types of storage to choose from, and the one you use relies on the operating system you are utilizing.
Interface, type, and size are three critical criteria you’ll use to assess your laptop’s internal storage. Solid-state or hard drive storage (SSD or HDD) are two local storage options that you can use for your custom laptop.
There are relatively some reasons to have a hard disk these days. This primitive technology is low-cost and capable of storing a vast quantity of data. However, it’s pretty sluggish.
You should only use these drives as a backup for the primary storage device. SSDs are speedy and dependable. SSDs come in a variety of capacities, ranging between 128GB and 1TB.
Hard drives are available in capacities ranging from 500GB to 2TB. For most purposes, a 256GB and a 512GB SSD are ideal.
If you want more storage and don’t have enough for an M2 SSD, go for a 1TB HDD, which comes with a reasonable price. While it is not fast enough for everyday use, it is excellent for storing multimedia content.
4. GPU
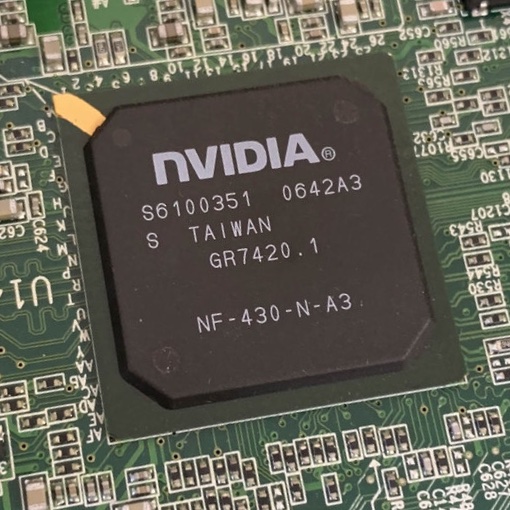
GPU NVIDIA
An Nvidia GTX series small graphics card seems to be the only solution for gaming laptops. Nowadays, there are two main classes on the market: Maxwell and Pascal. The most recent is Pascal, which includes the top GTX 1080.
The Intel i-CPU comes with a built-in graphics card, which is very amazing! For most individuals, integrated graphics are sufficient for daily use and several light gaming.
Nvidia Quattro GPUs have a similar architecture to their gaming counterparts, but they are responsible for professional purposes. 3D rendering, video editing, and mathematical simulations all require these cards.
Since it is the most costly item among the laptop’s components, you should only get it if you need it.
5. Screen Display

The Screen Is The Thing You Will Be Staring At For Most Of The Day
Although it is not a widely considered component, your screen has a significant impact on your gadget’s appearance and enjoyment. Because you’ll be staring at it for most of your day, choosing the right one is crucial.
Resolution and size are the two most important factors to consider. Notebook with screens ranging between 10 inches and 17 inches are available.
You will not be able to modify the screen size once you’ve chosen your laptop. If you don’t like the screen resolution of a specific model, your only choice is to switch to another one.
The ideal spot for screens right now is either 13 inches for mobility or 15 inches for performance. 17-inch displays are pleasant to use, but they are only ideal if you won’t be carrying your notebook all the time.
Large screens also consume more electricity to illuminate, resulting in an increase in power consumption. On the other hand, 10-inch and 11-inch laptops frequently appear as convertible and ultraportable tablets.
Because these devices are so small, there aren’t a lot of setup choices. The amount of pixels of your laptop’s display is referred to as resolution.
For instance, when Apple advertises its laptops as the retina, it simply means that the pixels are so thick that they can’t be identified. Most laptops are available with 4K screens, which are comparable to the retina versions of Apple products.
The majority of PCs, on the other hand, come with 1080p screens. They’re not just inexpensive, but most applications intend to operate on a 1080p screen.
If you are playing video games, the lesser resolution implies more excellent frame rates.
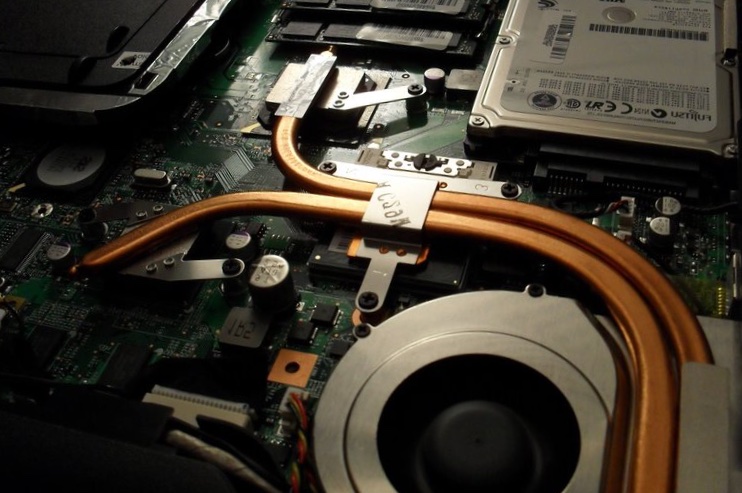
6. Other Features

Cooling Fan
You may pick from a variety of different options on most self-built laptops. Fingerprint readers, spacious touchpads, and micro SD card readers are all common additions.
However, the majority of these items are not for users to install. If they are available, you must inquire with the supplier.
A network card seems to be the only thing you might install, and going for one that supports 802.11ac is necessary. Since this one is the most recent networking technology, it ensures that you get the best performance possible from any wifi hotspot.
7. Choose Sufficient Battery Life
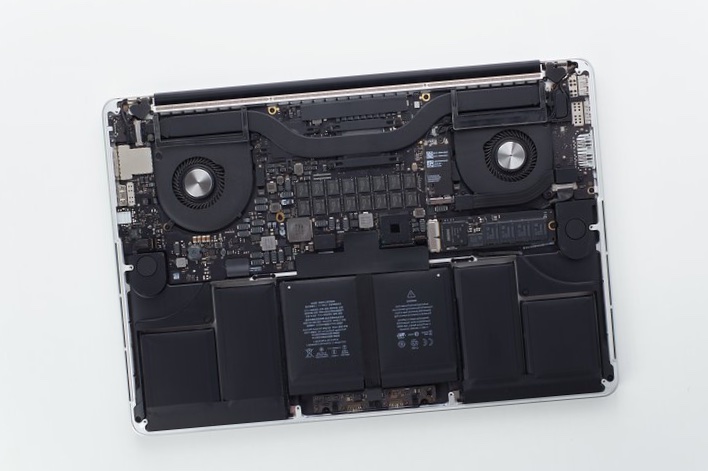
Inside A MacBook
You’ll need to look for a battery with a suitable form and connector for your laptop. The battery comprises integrated circuits (ICs), which inform the notebook about temperature, and if it is not working.
Choose an extended battery life if you want to move it around a lot. To select the right battery, you’ll have to compare a lot of them.
Assemble The Laptop
After all the components are available, you may put them together to make an entire laptop device. Now, follow the instructions below.
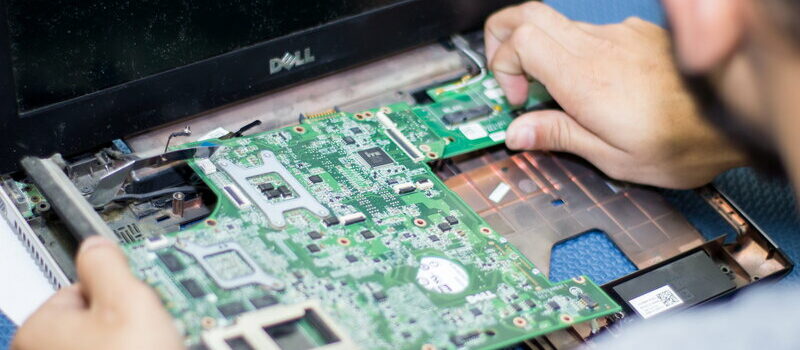
Step 1: Flip-Up The Laptop Shell And Install The CPU

A Custom Laptop Will Meet Your Demands And Save Your Budget
After flipping up the notebook shell, a CPU lock might be around the port where the CPU is located. To turn the CPU lock to the “unlocked” state, use a flathead screwdriver.
The desktop processor can only go in one direction in the slot. If the processor doesn’t seat properly, do not push it because the pins will flex, causing the CPU to fail. Place the CPU lock into the “locked” position once it has been installed.
Step 2: Install The Network Card And RAM
Line them diagonally with the gaps and push them in. If you have purchased a GPU, install it in the same manner. Then, connect the wire once you have installed the network card.
Step 3: Install Hard Drive
Be Careful When Working With Laptop Components
Disconnect the drive bay’s lid panel. The placement of the bay changes according to the shell.
You must attach the hard drive to the socket and ensure the hard drive is fastened to the socket with four laptop screws. The screw slots will guarantee that it is in the proper orientation.
Then, apply sufficient pressure with the grip adhesive to position the drive. Once you install it, most brackets should line up with two screw holes.
Next, remove the motherboard’s cover panel, which is more challenging than the hard drive. After loosening all the screws, remember to pry it apart.
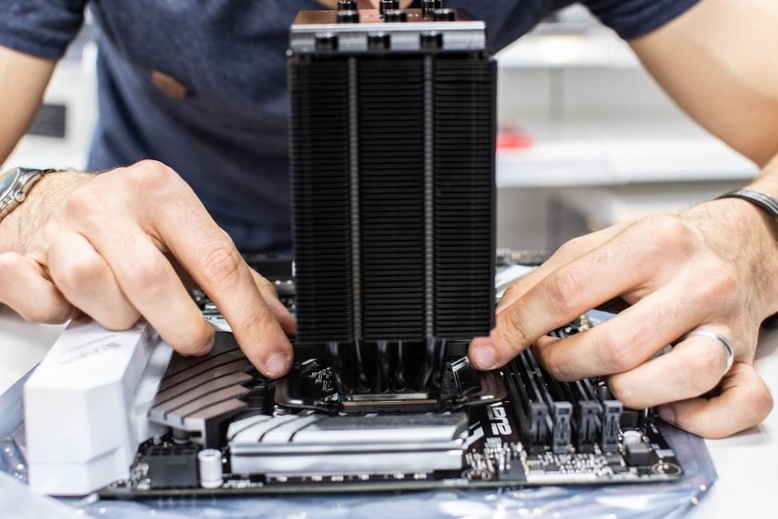
Step 4: Install The Fan
This fan cools the processor and several other components. A cooling fan should come standard with the CPU. The bottom of most fans will have thermal paste where it interfaces the CPU.
If the cooling fan doesn’t come with any paste, you’ll need to reapply the paste before installing it. As you try to line things up, this step might be difficult.
Instead of forcing the fan and heatsink assembly into place, wriggle it in. There could be additional mounting screws to install as well.
You should put some dust filters inside the bay to prevent dust from fouling the heatsink. Keep angling the heatsink until you reach the ideal location. It will prevent the thermal paste from smearing your parts.
After mounting the fan, connect its wire to the mainboard. Finally, let’s turn on your laptop and check it. Your laptop will get overheated and shut down after a while if the fan is not connected.
You can rely on the instructions in this video to better understand how to assemble a laptop.
Final Thoughts
We hope this article on how to build your own laptop is beneficial to you. With this self-custom laptop, you can save your budget and still get a sufficient version for your demands.
Thank you for reading!

Paul Sullivan is the leading writer for articles on our website. He has over 10 years of experience as a technology reviewer, especially on laptops and computers.
With his long experience, we believe that he will bring you accurate and valuable knowledge and assessment.